Wednesday, 5 October 2016

how to change your car battery

How to change a car battery

  1. Gather the correct materials - Before you get started, you will need the following materials: Gloves, Ratchet with extension (¼ inch), Safety glasses, Sockets (8mm, 10mm, and 13mm), and Water (almost boiling).
  2. Make sure the car is in a safe place - Make sure you have your car parked on a flat surface, away from traffic, away from smoking or any other situation that may cause an electrical current to spark and cause a fire. Then, be sure to take off any metal accessories such as rings or earrings.
  3. Put the parking brake on and turn off the car - This is one of the most important steps. Be sure that the car is completely off.
    reading codes from radio
  4. Check to if radio and navigation codes apply - Prior to removing or disconnecting your battery, see if your car requires any radio or navigation codes to be imputed once the new battery is installed. These codes can be found in your owner’s manual, or obtained from your car’s dealership.
    If your vehicle does need these codes, and you don’t have a memory saver to install in the cigarette lighter, then write down the codes. This will ensure your radio and navigation work as they did before the battery was removed.
    car battery visible
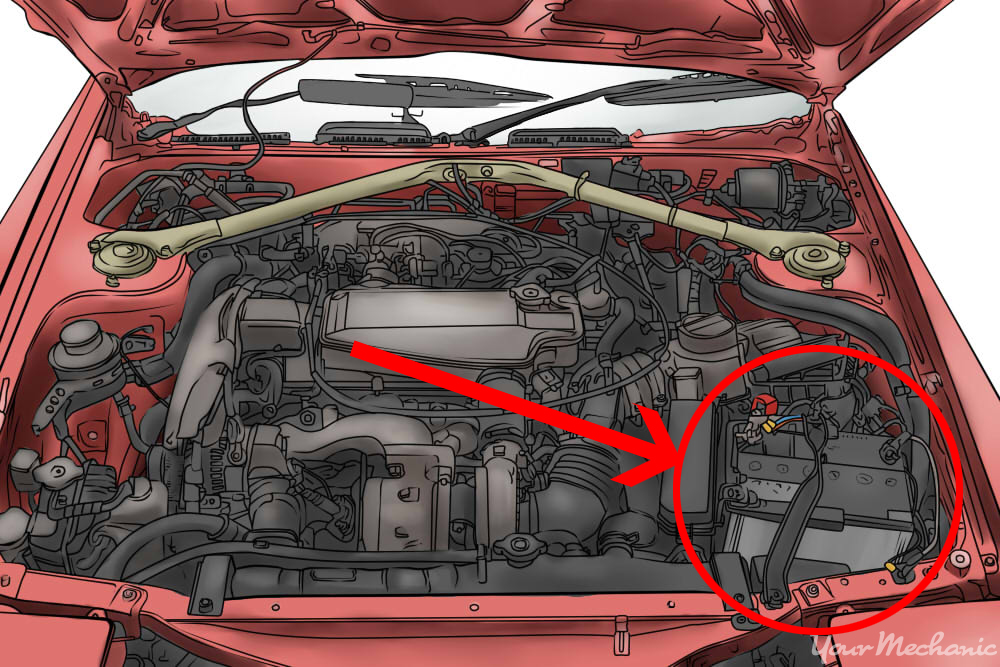
  5. Locate the battery - Open the hood and secure with hood prop or struts. The battery should be should be in plain sight and there may be a cover to remove, depending on vehicle.
  6. Check the age of your battery - Checking the age of the battery can give you an idea if it is time to replace it. Most batteries need to be changed out every 3-5 years. Therefore if your battery age falls in that age bracket it may be time for a new battery.
    date showing on car battery
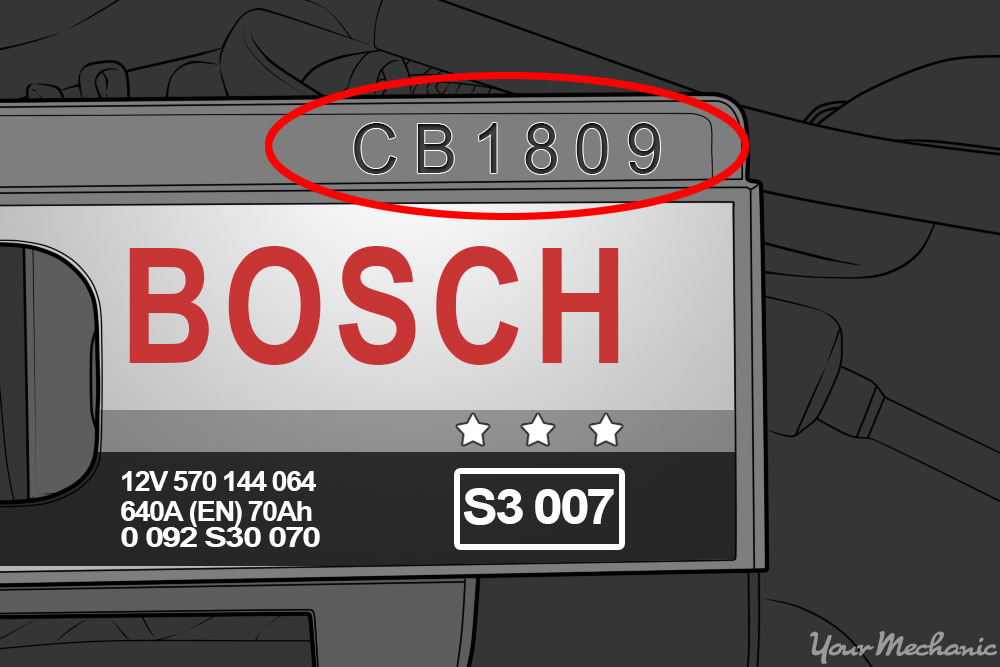
    Tip: If you do not know the age of your battery, many batteries actually come with date codes to identify the year and month the battery was shipped, giving you a great estimate of the age and condition.
  7. Check the car headlights - Consistently having to jumpstart your car is another sign you may need a new battery. Another symptom is dim vehicle lights. To test this, try turning the key to the on position and looking over your dashboard.
    corroded battery terminal
  8. Check the battery for corrosion - Visually inspecting the battery can give you an idea of the state it is in. You can look for corrosion on battery terminals or sulfate build up, a white powder, which would be indicative of a bad connection. Occasionally cleaning the battery terminals can solve the problem of low connection.
    Warning: Please always do so with gloves on to protect your hands from the sulfate powder.
  9. Check the battery with voltmeter - Some people have access to a device known as a volt meter. If you want to use this to test your battery, make sure the car and lights are off and put the positive meter on the positive terminal and the negative meter on the negative battery terminal.
    Check for a reading of 12.5 volts. If it reads below 11.8, it is a discharged battery.
    removing battery terminal
  10. Wear protection from sulfate - Make sure you have put on your safety glasses and gloves, this will help keep you away from the sulfate buildup, if there is any. Using the correct size socket with extension and ratchet, remove the bracket that secures the battery to the vehicle, known as a Battery Hold Down.
    You can then use a correct size socket and ratchet to first loosen the negative battery terminal. Use your gloved hand to twist off and remove the terminal after it is loosened as you pull off battery post, set aside, then do the same for positive.
    Tip: If necessary, before removing the battery cables, label each side so you do not mix up positive and negative. Mixing these up can cause a short circuit and possibly damage the entire electrical system.
    person showing proper lifting technique
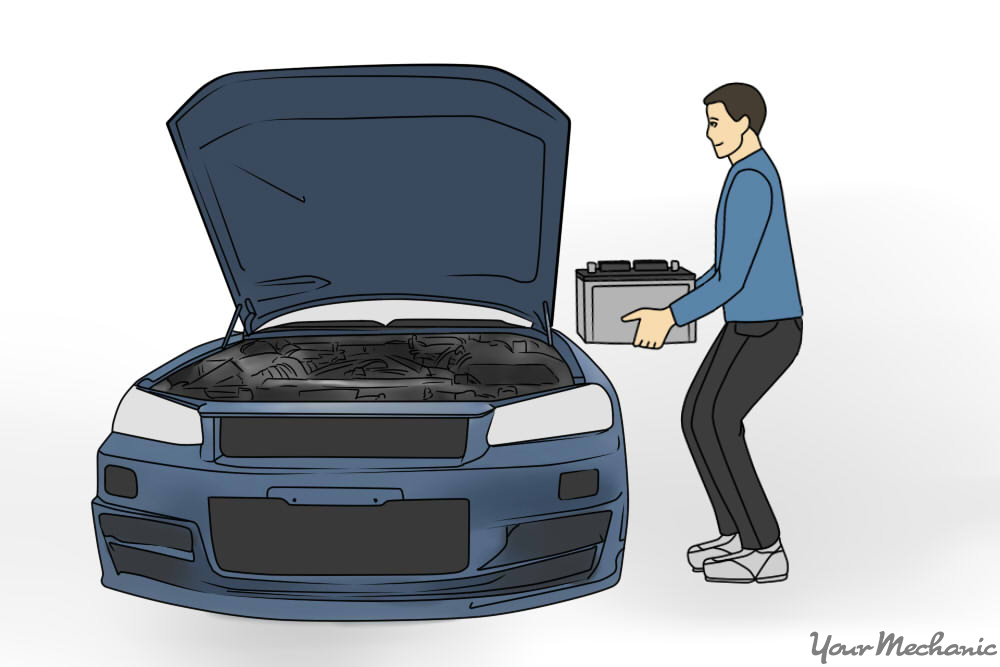
  11. Securely remove the battery from the car - Removing the battery is a physical activity and is the most difficult part of the change. Carefully and securely lift and remove the battery from car. Be sure to use proper posture, as even though the battery is small, it is heavy and usually weighs around 40 pounds.
    Tip: Now that your battery is removed, you can take it to your local auto store for proper testing. You can dispose the old battery and obtain a new battery that is the correct one for your car.
    person pouring hot water onto terminal
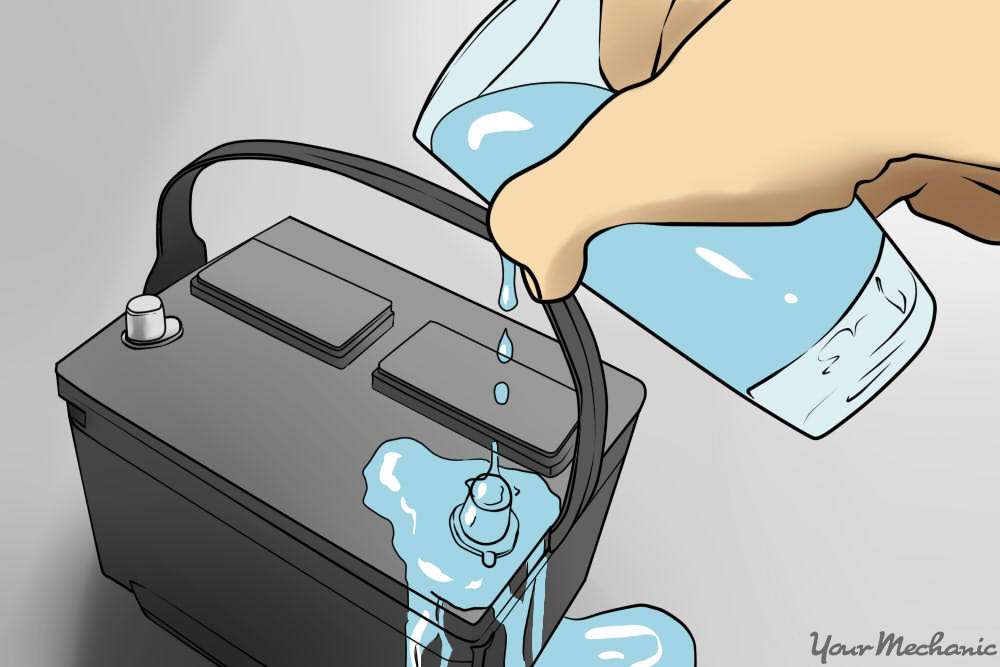
  12. Clean the battery terminals - With the battery out, it is then important to clean off the battery terminals. To do so, use almost boiling water in a cup and pour it directly onto each terminal. This removes any corrosion and any sulfate powder that may not have been removed earlier.
    battery with positive terminal clearly labeled
  13. Install the new battery - Now it is time to install your new battery. Using proper posture, carefully place the battery into the holder. Using the correct sized socket and ratchet, re-install the Battery Hold Down to ensure the battery is secured to vehicle.
  14. Secure positive - Take the positive terminal and place it on the battery post, making sure it is secured all the way toward the bottom of the post. This will help avoid future corrosion.
  15. Secure negative - Once you have snugged down the battery terminal onto post with ratchet, you can repeat with the negative terminal.
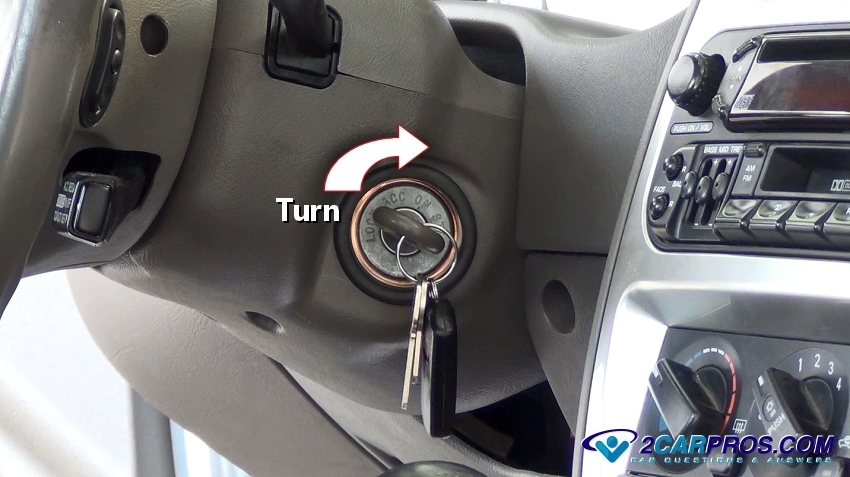
    Tip: Again replace these in order to avoid electrical problems. Replace any battery covers if applicable and close the hood.
  16. Turn your key to on but do not start - Get into your vehicle, shut the door, turn key to on position but do not start yet. Wait 60 seconds. Some vehicles have electronic throttle bodies and this 60 seconds will give the vehicle times to re-learn the correct positioning and re-start without any problems.
  17. Start the vehicle - After 60 seconds you can start the car. If the car starts up with no problem and you notice all the lights turn on, you have successfully changed your battery!
Now you can input any radio or GPS codes, or if you are using memory saver, now is the time to remove it.

Some batteries are not located in the hood

Instead of the hood, some vehicles have their batteries install in the trunk. This is the case with most BMWs. To locate this battery, open your trunk and locate the battery compartment near right side of trunk. Open and lift to reveal the battery. You may now follow steps three through eight above to remove and change the battery.
Rather than under the hood or in the trunk, some vehicles come equipped with their battery under the back seat. An example is Cadillacs. To locate this battery, look for and push in the side clips of the vehicle’s back seat, which will release entire back seat for removal. You can then remove the entire back seat from the car and once removed, the battery will be in sight and you can begin the replacement. You may now follow steps three through eight above to remove and change the battery.
You have successfully changed you own battery! It is important to remember that your old battery needs to be recycled properly. In some states, like California, a core fee is charged when you purchase a new battery if your old one was not returned at the time. You will receive this core fee back once the old battery is returned and properly recycled.
If you do not have time or wish to have a professional change your battery for you, feel free to contact YourMechanic to have a certified mobile mechanic replace your battery for you.

how to change a flat tyre

Having a flat tire and not knowing how to change it can make you feel helpless. Changing a tire is easy enough to do, and everyone should have a general idea of what’s involved:

1 Secure the vehicle so that it won't roll; and roll the spare tire to the scene of the action.

Never change a tire on an incline or hill; always seek a flat surface, even if it means driving on a flat tire. Use bricks, wooden wedges, or metal wheel chocks to block the wheels at the opposite end of the car from the end that is to be raised.
414048.image1.jpg

2 Pry off the wheel cover.

You can use a screwdriver to pry the wheel cover off. Just insert the point of the tool where the edge of the cover meets the wheel, and apply a little leverage. The cap should pop off. You may have to do this in a couple of places, as if you were prying the lid off a can of paint.
414050.image3.jpg

3 Loosen the lug nuts.

You might know this as breaking the lug nuts. Whatever you call it, find the end of the wrench that fits the lug nuts on your vehicle, and fit it onto the first nut. Apply all your weight to the bar on the left. This starts turning the nut counterclockwise, which loosens it. Dont remove the lug nuts completely; just get them loose enough to remove by hand after you jack up the vehicle. A hollow pipe and a cross-shaft wrench can loosen the tightest lug nuts.
If you have alloy wheels that are held on by lug nuts with delicate finishes, the delicate aluminum or chrome-plated lug nuts need careful handling. They should never be loosened or replaced with power tools that can scratch the delicate finish.
414052.image5.jpg

4 Jack up the vehicle about 6 inches off the ground.

Place the jack securely under the edge of the car. Proper locations may vary among vehicle models, so consult the owner’s manual for the right places to put the jack.
If you have a scissor jack (image a), insert the rod or wrench over the knob, and then crank. If you have a hydraulic jack (image b), place the handle into the appropriate location and pump up and down. Use nice, even strokes, taking the jack handle from its lowest point to its highest point on each stroke to cut down on the labor involved.

5 Remove the flat tire.

Take the lug nuts completely off by hand and put them in a safe place — inside the wheel cover or hub cap works well. Grasp the flat tire with both hands and pull it straight toward you. As you pull the flat off, it should slide along the bolts until it clears the end of the bolts and you find yourself supporting its full weight. Roll the flat along the ground to the rear of the vehicle to get it out of the way.

6 Lift the spare onto the lug bolts.

Because tires are heavy, you may have a little trouble lifting the spare into place — especially if you’re not accustomed to lifting heavy things.

7 Replace the lug nuts and tighten them by hand.

Give each lug nut a jolt with the wrench to get it firmly into place, but wait until the car is on the ground before you really try to tighten the lug nuts.

8 Lower the vehicle and tighten the lugnuts.

After the vehicle is resting on the ground, use the lug wrench to tighten the lug nuts as much as you can.

9 Replace the wheel cover or hubcap.

If your car has wheel covers with a delicate finish, the owner’s manual should provide instructions for replacing it. If your car has hubcaps, place the hubcap against the wheel and whack it into place with the heel of your hand. Cushion your hand with a soft rag first so that you won’t hurt it. And don’t hit the hubcap with a wrench or hammer — you’ll dent it.

how to repair your turn signal light

Turn Signal Repair

Easy step by step guide on how to repair an automotive turn signal system that is not working, this information is presented in the order of probability and pertains to most vehicles. Difficulty Level - 4 Begin with the vehicle on level ground, in park with the engine "OFF". Step 1 - Turn the ignition key to the "ON" position, (do not start the engine) this will power up the electrical system for testing.
Ignition Switch "ON"
Step 2
- Locate the power distribution center (PDC) or fuse panel to check all system fuses. Learn more - To locate the fuse consult the owner's manual or search Google Images.
Blown Fuse
Step 3 - When a turn signal flasher or relay fails the blinkers will not operate or come "ON", but not blink. A direction signal system is designed to operate with a flasher or blinker unit which interrupts the signal which created the blinking action. Learn more - Locate turn signal flasher in Google Images.
Turn Signal Flasher
Step 4
- When a turn signal switch fails the system will short or go "open" causing the blinker not to operate. Use a test light to test input and output power circuits using a wiring schematic. Learn more - Find a wiring diagram in Google Images.
Turn Signal Lever
Step 5 - A lighting module is sometimes used to control the all vehicle lighting systems, when this module has a problem various lights will fail to operate and the module needs to be updated or replaced (reprogrammed).
Lighting Module
Helpful Information A turn signal switch is used to operate the direction signal system in a vehicle, which helps communicate an intended direction. Some lighting system designs integrate the turn signal and brake light systems which share the same circuit. Most lighting systems are grounded near the light bulb, which will produce a single bulb operation failure.

how to fix your broken tail light

Using a Lens Repair Kit

  1. Image titled Fix Car Tail Lights Step 5
    1
    Remove the taillight lens.
  2. Image titled Fix Car Tail Lights Step 6
    2
    Repair lens cracks with lens repair tape. Using tape is meant to only be a temporary fix. You purchase tape or buy a lens repair kit that comes with resin that you simply place over the crack to make it waterproof again.
    • You want to clean and dry the area where the tape is to be applied. Just before adding the tape wipe the area with a lint free cloth that is wet with rubbing alcohol, and let it dry, then apply the tape. Do not use glass cleaner to clean the area because the ammonia in the glass cleaner will cause the tape not to stick as well as it should. The last wipe with rubbing alcohol will remove most of the impurities and leave a clean surface.
      Image titled Fix Car Tail Lights Step 6Bullet1
    • Measure the size of the crack and cut the tape slightly larger than the damage of the lens.
      Image titled Fix Car Tail Lights Step 6Bullet2
    • Remove the backing of the tape.
      Image titled Fix Car Tail Lights Step 6Bullet3
    • Smooth out the air bubbles when you apply the tape, so they don't distort the lens.
      Image titled Fix Car Tail Lights Step 6Bullet4
  3. Image titled Fix Car Tail Lights Step 7
    3
    Repair holes and broken spots with lens repair resin. If there's a gouge or broken spot, you can fill in the hole with plastic resin. Buy a lens repair kit that comes with supplies for filling in the holes. [1]
    • Cover the outside of the taillight with the plastic tape that comes with the repair kit, to prevent the plastic resin from leaking through.
      Image titled Fix Car Tail Lights Step 7Bullet1
    • Mix the resin with a catalyst and coloring agent according to the instructions included in the kit. Wear a pair of disposable gloves during this part of the process to avoid getting resin on your skin.
      Image titled Fix Car Tail Lights Step 7Bullet2
    • Pour the resin into the provided syringe.
      Image titled Fix Car Tail Lights Step 7Bullet3
    • Squirt the resin into the hole, making sure it covers the entire area that needs to be filled.
      Image titled Fix Car Tail Lights Step 7Bullet4
    • Let it cure for at least 2 hours.
      Image titled Fix Car Tail Lights Step 7Bullet5
    • Remove the tape and sand the surface to smooth it out.
      Image titled Fix Car Tail Lights Step 7Bullet6

how to repair your tail light

Assessing the Problem

  1. Image titled Fix Car Tail Lights Step 1
    1
    Check the fuse. A blown fuse usually causes both lights to go out. On newer cars, the tail lamps can be fused separately and/or each bulb or shared circuit can be fused. A fuse can be blown due to other problems, so you'll need to check more than just the fuse, but it's the right place to start. Look in your owner's manual to determine where the fuse box is located in your car. On older cars, the fuse box is located under the dash. On most newer cars it can be located under the hood or the dash. The manual will have a labeled picture of the fuse box showing which fuse is which. Making sure the ignition is off, take the cover off of the fuse box and locate the taillight fuse. Use a flashlight to inspect the fuse and determine whether it's blown. On most new cars, the fuse would have to be removed to be checked due to the arrangement of the fuses.
    • If the piece of metal inside the taillight fuse is intact, the fuse is still good.
      Image titled Fix Car Tail Lights Step 1Bullet1
    • If the piece of metal looks broken or fractured, the fuse is blown and will need replacing. Use your fingers or a tweezer to take out the fuse. Most new cars have a fuse extractor in the fuse box or in the tool kit. It is a small white plastic tool that resembles a pair of pliers. Bring it to an auto store to find a match, then buy a replacement and insert it in the proper position to replace the blown fuse.
      Image titled Fix Car Tail Lights Step 1Bullet2
  2. Image titled Fix Car Tail Lights Step 2
    2
    Look at the tail lamp wiring. These are the wires that lead to the tail lights, located inside the lid of the trunk. Open the trunk and take a look. You can see where the wires should connect in order for the electrical system to properly work. If a wire has come loose, reattach it.
    • On most new cars, the wiring harness is located behind panels in the trunk and is not accessible without removing the panels.
  3. Image titled Fix Car Tail Lights Step 3
    3
    Check the taillight bulbs. If the fuse and wiring look right, the bulbs themselves might be the problem. To check them, unscrew the taillight lenses from the outside using a screwdriver. If your lenses don't have screws, open the trunk so you can access the lights from the inside. Unscrew the bulbs in question and check them the way you would any household bulb: by looking at the filament wire inside them to determine if it is still intact. The bulb can be checked by tapping it against your hand to see if the filament is moving or vibrating.
    • Most tail lamps have stop lamp/turn indicator bulb(s), reverse lamp bulb, tail lamp bulbs, side marker bulb, and on some models a self standing turn indicator bulb. On cars where the brake and turn signal are sharing a bulb, when the bulb is burnt out, the turn signal indicator will flash faster than normal. This will apply also if the vehicle has a burnt out turn signal bulb in the rear amber turn indicator.
    • If the bulb is burnt out, you'll need to replace it. Take it to your local auto store and buy the correct model for your car.
      Image titled Fix Car Tail Lights Step 3Bullet1
    • If the bulb is fine, your car may have a deeper electrical problem. If the fuse, taillight wires, and bulb are all in good shape, it's time to take the car to the mechanic.
      Image titled Fix Car Tail Lights Step 3Bullet2
    • When you remove a bulb for replacement, you should inspect the socket for burnt contacts and the tail lamp for burnt contacts or melted socket boards.
  4. Image titled Fix Car Tail Lights Step 4
    4
    Check the taillight lenses. Whether or not you were able to fix the problem of your tail lights working correctly by examining the fuse, wiring and light bulb, it's important to check the lenses as well to make sure they're not cracked or broken. Water entering the lens can burn out a bulb. Keep reading to learn how to repair a broken or cracked lens.

1. Got the door-hinge repair kit in hand, and a jack or a faithful minion to support the door for a few minutes? The only real hard part of this procedure is removing the old pin, which has probably been peened over to keep it from coming out.
We tried a grinder, a cold chisel and a file on the hardened pin, and ultimately used a carbide burr on a die grinder to remove the pin's lip. You could use a cutoff wheel on a Dremel tool to cut the pin in half, as well. Wear eye protection.
2. Then we simply tapped the pin out with a punch, although here we show you how to do it on a hinge removed from a wrecked car.
3. Once the pin is loose you can unbolt the inner hinge half from the car's A-pillar and remove it to the workbench.
4. Pry the worn-out bushings from the hinge half. The worn OEM bushings were made of brass cloth wrapped with some sort of fiber, and had worn until there was metal-to-metal contact, allowing the door to droop nearly an inch.
5. The replacement bushings are made of oil-impregnated bronze, and promise to outlast the originals—although we can't really complain about the service life of door-hinge bushings that have seen 145,000 miles of service in heavy urban driving with lots of door-opening activity. We simply tapped the new bushings into place lightly with a hammer. The lip on the new bushings goes where the lip on the old bushings was, at the top and bottom of the hinge arms.
6. Now you can install the hinge back to the A-pillar with the bolts finger-tight. With a little help, line up the holes and tap the new hinge pin into place. The pin on our Jeep had to come in from the bottom because the door sheet metal was in the way.
Electric windows are found in all sorts of vehicle these days, including farm equipment. While they are convenient, allowing the driver to open and close windows at will to circulate air, they also serve an important safety role, giving a driver the ability to roll up windows quickly in an emergency. With so many power car windows, there are bound to be mechanical failures. While time consuming, repairing electric windows is well within the ability of a backyard mechanic, once the problem is narrowed down. The easiest way to track down the problem is to eliminate the most obvious, a bad fuse or wiring. The steps for fixing power windows are arranged in order of difficulty. If one solution doesn't work, move on to the next
1
Locate the fuse box, usually under the dashboard near the steering wheel, and check for blown fuses, easily identified by a break in the metallic strip running up the center of the clear fuse.
  • Image titled Fix a Broken Electric Car Window Step 2
    2
    Replace the fuse and see if that fixed the car window.
      Image titled Fix a Broken Electric Car Window Step 4
    • You will probably need a flashlight to check the fusesImage titled Fix a Broken Electric Car Window Step 2Bullet1
    • Image titled Fix a Broken Electric Car Window Step 3
      3
      Check for loose wires going into or coming out of the fuse box. Tighten any you find and see if the electric window works.

    • 4
      Check the window control switch. If it's dirty, clean it and see if the window works.
      • If not, remove the whole switch panel and check those electrical connections
  • 5
    Remove plastic access panels on the door following manufacturer's directions. This usually involves locating and removing door panel mounting bolts. Carefully disconnect any electrical wires in order to remove the entire door panel.
  • Image titled Fix a Broken Electric Car Window Step 6
    6
    Pull back insulation, if your car has it, to expose the electric window motor. Use an automotive test light to check all of the electrical wiring in the door.
    • Be sure the test light is grounded before testing begins.
      Image titled Fix a Broken Electric Car Window Step 6Bullet1
  • Image titled Fix a Broken Electric Car Window Step 7
    7
    Tape the window glass in place in the closed position using masking tape to prevent it slipping down while working with the window motor and regulator.
    • Depending on the vehicle, you may need to remove the window in order to replace the window regulator assembly.
  • Image titled Fix a Broken Electric Car Window Step 8
    8
    Replace electric window motor if necessary, following instructions included with the new motor.
  • Image titled Fix a Broken Electric Car Window Step 9
    9
    Take the window regulator out of the door panel by removing the mounting bolts. Inspect the regulator and if necessary replace it, matching the new unit with the old one.
    • Some windows, mainly in older cars, have rivets instead of bolts to hold the window motor in place. In order to remove rivets, a punch a hammer and a drill are needed.
  • Image titled Fix a Broken Electric Car Window Step 10
    10
    Return the motor back in place, assemble the parts by following the steps backwards.
  • Image titled Fix a Broken Electric Car Window Step 11
    11
    Remove masking tape, and check window operation to make sure it is working properly. Make necessary adjustments before reassembling door.